
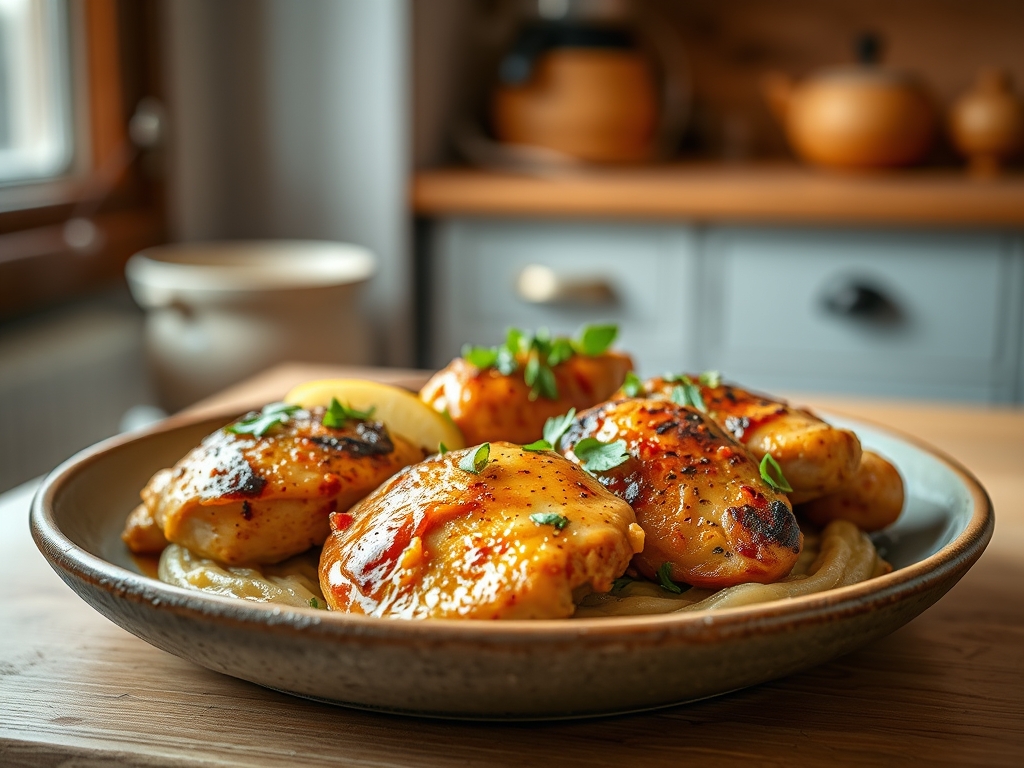
Imagine the sharp, citrusy scent of fresh lime zest hitting a hot ceramic plate while the rhythmic hiss of steam escapes a pressure valve. There is a specific kind of kitchen magic that happens when high-pressure physics meets fresh aromatics. You want dinner to be a triumph of flavor without the three-hour commitment; that is exactly where these healthy instant pot chicken recipes come into play. We are moving far beyond the era of bland, rubbery poultry. Instead, we are harnessing the power of steam infusion to create textures so tender they practically dissolve, all while keeping your macros in check and your palate energized. This is about working smarter, using the science of the kitchen to bypass the slow-cooker slump. We are going to deglaze, emulsify, and aerate our way to a week of meals that feel like a high-end bistro service but take less time than a standard workout. Grab your favorite apron; we are about to turn your kitchen into a laboratory of delicious efficiency.
The Gathers:
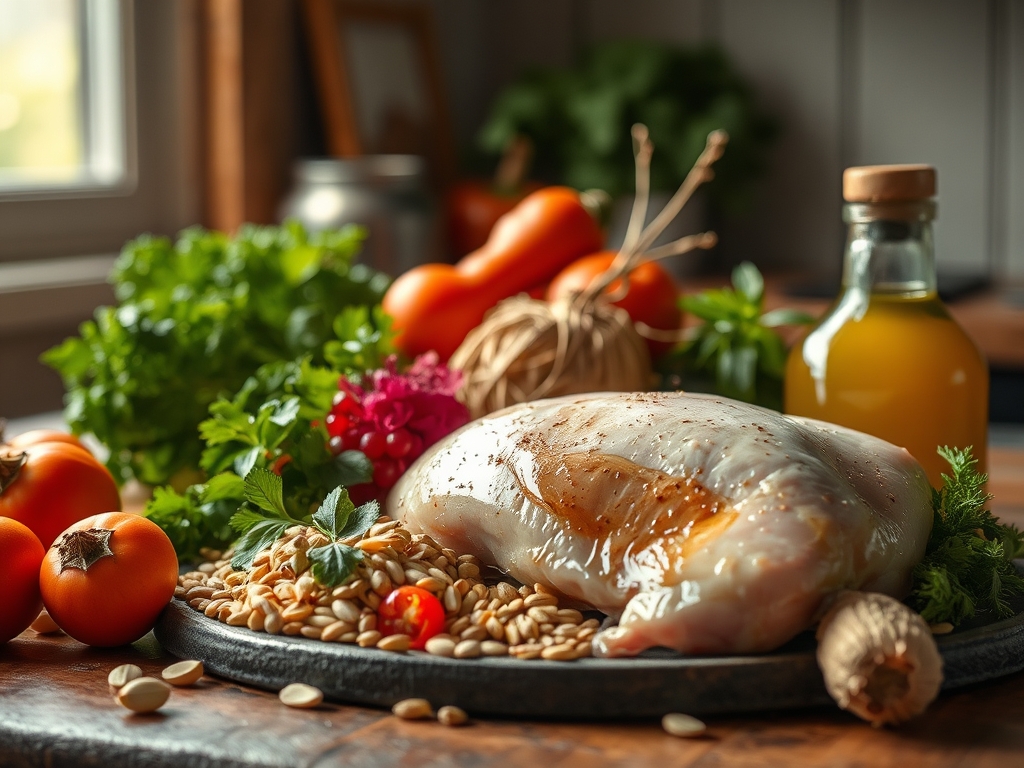
Setting up your mise-en-place is the difference between a frantic scramble and a seamless culinary flow. When prepping for these healthy instant pot chicken recipes, your ingredient list should look like a vibrant spectrum of antioxidants and lean proteins. Start with organic, air-chilled chicken breasts or thighs; air-chilling prevents excess water retention, ensuring your spices actually stick to the meat rather than sliding off in a puddle of diluted moisture. You will need high-smoke-point fats like avocado oil or clarified butter to facilitate the Maillard reaction during the initial sear.
Gather your aromatics: pungent garlic cloves, sharp ginger, and shallots. Use a microplane to grate your aromatics directly into the pot; this increases the surface area, allowing the volatile oils to release more effectively into the cooking liquid. For "Smart Substitutions," consider using coconut aminos instead of soy sauce to lower sodium levels while maintaining a deep, umami-rich profile. If you are watching carbohydrates, replace heavy cream with full-fat coconut milk or a slurry made from arrowroot powder. A digital scale is your best friend here; measuring ingredients by weight ensures consistent results every single time you hit that start button.
The Clock
Efficiency in the kitchen is all about the "Chef's Flow." For most of these recipes, your active prep time will hover around 15 minutes. This includes the time spent with your bench scraper clearing the cutting board and organizing your spices. The actual pressurized cook time typically ranges from 8 to 12 minutes, depending on whether you are using bone-in or boneless cuts. However, the secret to the perfect texture is the "Natural Release" phase. Budget an extra 10 minutes for the pressure to drop on its own. This prevents the muscle fibers from seizing up, which happens during a sudden "Quick Release" when the internal moisture boils off too rapidly. Total time from fridge to table? Approximately 35 minutes of total focus.
The Masterclass
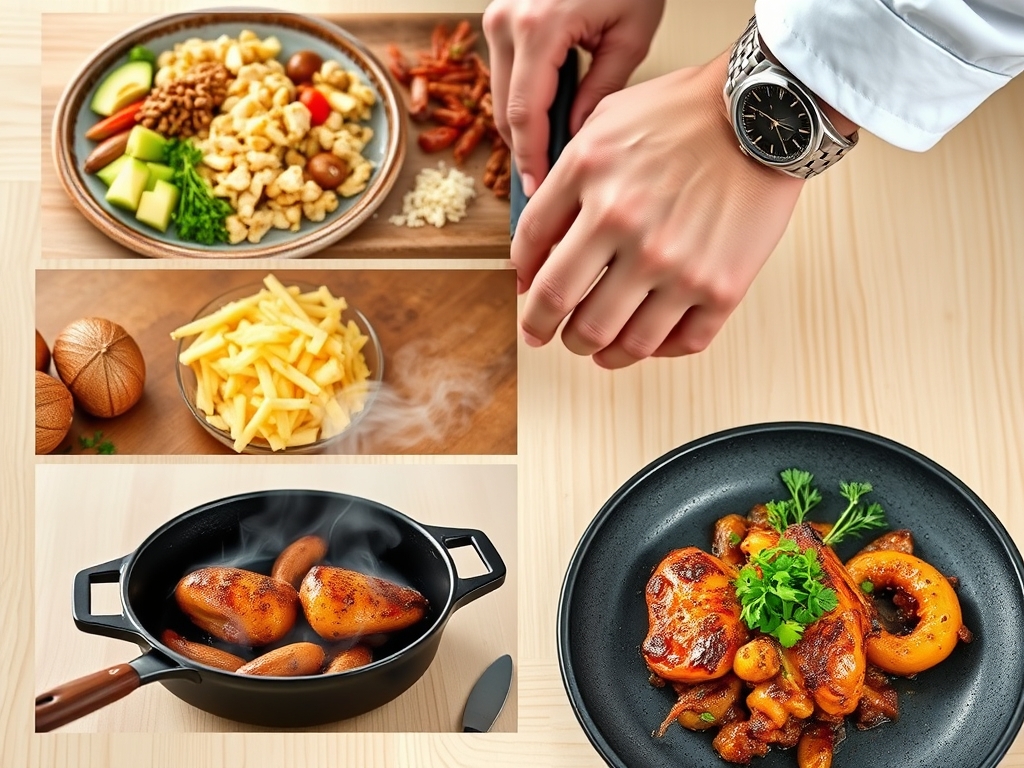
1. The Searing Phase
Before you even think about the pressure lid, select the "Saute" function. Add your fat and wait for the oil to shimmer. Pat the chicken dry with paper towels to remove surface moisture. Place the meat in the pot using tongs and do not crowd the pan.
Pro Tip: This step triggers the Maillard reaction, a chemical dance between amino acids and reducing sugars that creates hundreds of different flavor compounds. Without this sear, your chicken will taste boiled rather than roasted.
2. Deglazing the Fond
Once the chicken is browned, remove it and look at the brown bits stuck to the bottom. This is called "fond." Pour in a splash of chicken bone broth or dry white wine and use a wooden spoon to scrape those bits loose.
Pro Tip: Deglazing is essential for preventing the "Burn" notice. It also incorporates concentrated protein solids back into your sauce, creating a more viscous and complex flavor profile.
3. Layering the Aromatics
Add your vegetables and spices now. If you are making a curry or a piquant salsa chicken, toast the dry spices in the residual fat for 30 seconds until they become fragrant.
Pro Tip: This process, known as "blooming," dissolves fat-soluble flavor compounds in the spices, ensuring the heat and aroma are distributed evenly throughout the entire dish.
4. The Pressure Infusion
Return the chicken to the pot and add just enough liquid to reach the minimum line. Lock the lid and set the timer.
Pro Tip: Under pressure, the boiling point of water increases, which forces moisture into the connective tissues of the chicken. This breaks down collagen into gelatin much faster than traditional simmering, resulting in a succulent mouthfeel.
5. The Rest and Shred
Once the timer beeps, let the pot sit for a natural release. Transfer the chicken to a clean cutting board.
Pro Tip: This allows for thermal carryover, where the internal temperature continues to rise slightly while the juices redistribute. If you cut into it immediately, the moisture will escape, leaving the meat dry.
The Deep Dive
When we look at the macro nutrition of these healthy instant pot chicken recipes, we are aiming for a high-protein, moderate-fat, and low-glycemic load. A standard serving provides roughly 35 grams of protein with minimal saturated fats. For those following specific protocols, these recipes are incredibly flexible. Keto followers should lean into chicken thighs and add a dollop of grass-fed butter at the end. Vegan guests can swap chicken for chickpeas or extra-firm tofu, though you must reduce the cook time to 5 minutes to avoid mushiness. Gluten-Free diners are safe as long as you avoid pre-mixed spice packets that often contain flour as an anti-caking agent.
"The Fix-It" section:
- The "Burn" Notice: This usually means there is not enough thin liquid at the bottom. Fix it by adding 1/4 cup of broth and ensuring no bits are stuck to the liner.
- Rubbery Chicken: This is a sign of overcooking or a "Quick Release" that was too fast. Fix it by slicing the chicken thin and tossing it in a warm sauce to rehydrate the fibers.
- Bland Sauce: If the sauce is too watery, use a saucier to reduce the liquid on the stove or whisk in a tablespoon of Greek yogurt for instant creaminess.
For meal prep, reheating science is vital. To maintain "day-one" quality, reheat your chicken with a tablespoon of water or broth covered in the microwave or on the stovetop. This creates a mini-steam environment that prevents the proteins from becoming "leathery" during the second round of heating.
The Wrap-Up
You are now officially equipped to master the art of the pressure cooker. These healthy instant pot chicken recipes are more than just a way to fill a plate; they are a testament to how modern technology can honor traditional flavor profiles. By understanding the chemistry of the sear and the physics of the pressure release, you have graduated from a recipe-follower to a true kitchen scientist. Go ahead and experiment with different herb infusions and piquant acids. Your weeknight dinners will never be the same, and your body will thank you for the nutrient-dense fuel.
The Kitchen Table
Can I use frozen chicken in these recipes?
Yes, you can cook frozen chicken directly. Increase the pressure cook time by 5 minutes. Ensure the pieces are separated rather than a frozen block to allow the steam to circulate and cook the meat evenly through the center.
How do I prevent my chicken from drying out?
Always use a natural pressure release for at least 10 minutes. This allows the muscle fibers to relax and reabsorb the cooking juices. If you vent the steam immediately, the moisture inside the chicken will rapidly evaporate, leaving it tough.
What is the best way to thicken the sauce?
Switch to the "Saute" function after removing the chicken. Whisk in a slurry of cornstarch and cold water. Let it bubble for two minutes until the sauce becomes glossy and coats the back of a spoon with a thick consistency.
Can I double the recipe for meal prep?
You can double the ingredients as long as you do not exceed the "Max Fill" line on your inner pot. The cook time remains the same, but the pot will take longer to reach pressure due to the increased volume.