
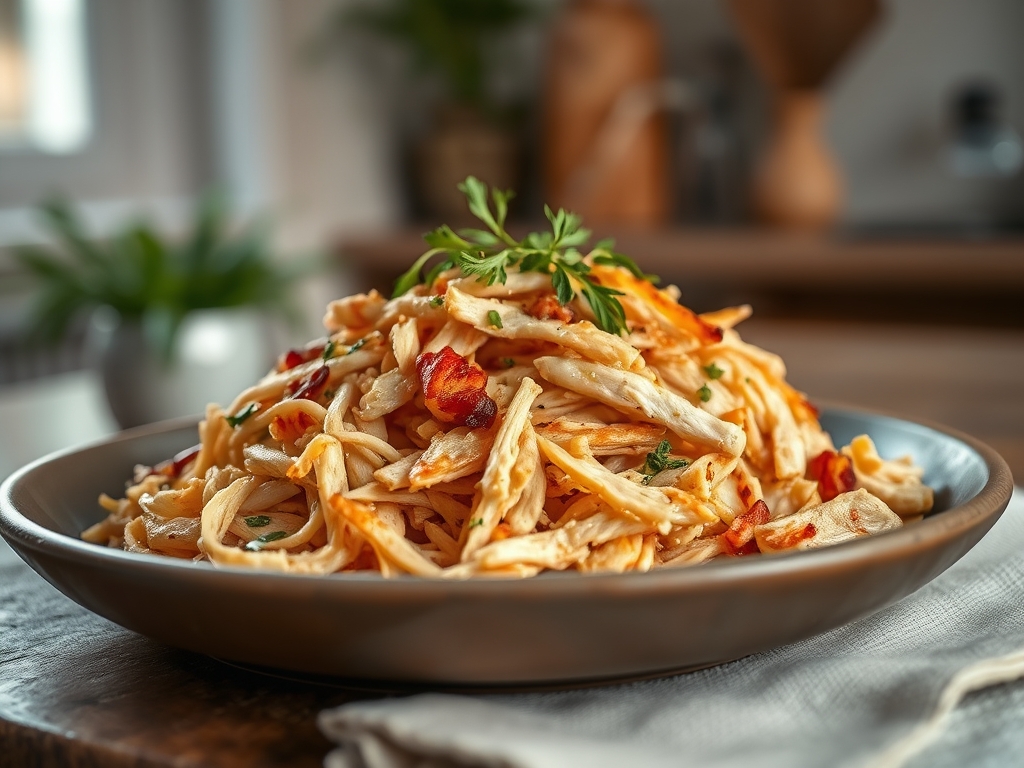
Picture the steam rising from a heavy-bottomed skillet as the piquant aroma of garlic hits the searing heat. There is something fundamentally grounding about the pairing of lean protein and earthy starch. When you master shredded chicken and potato recipes, you are not just making dinner; you are balancing structural integrity with comfort.
The shredded chicken provides a fibrous, savory canvas that absorbs sauces through capillary action. Meanwhile, the potatoes offer a creamy, starchy contrast that acts as a natural thickener. Whether you are aiming for a crispy hash or a velvety gratin, these two ingredients are the workhorses of a high-performance kitchen. We are going to dive deep into the molecular mechanics of these blends so you can achieve that perfect, restaurant-quality mouthfeel every single time.
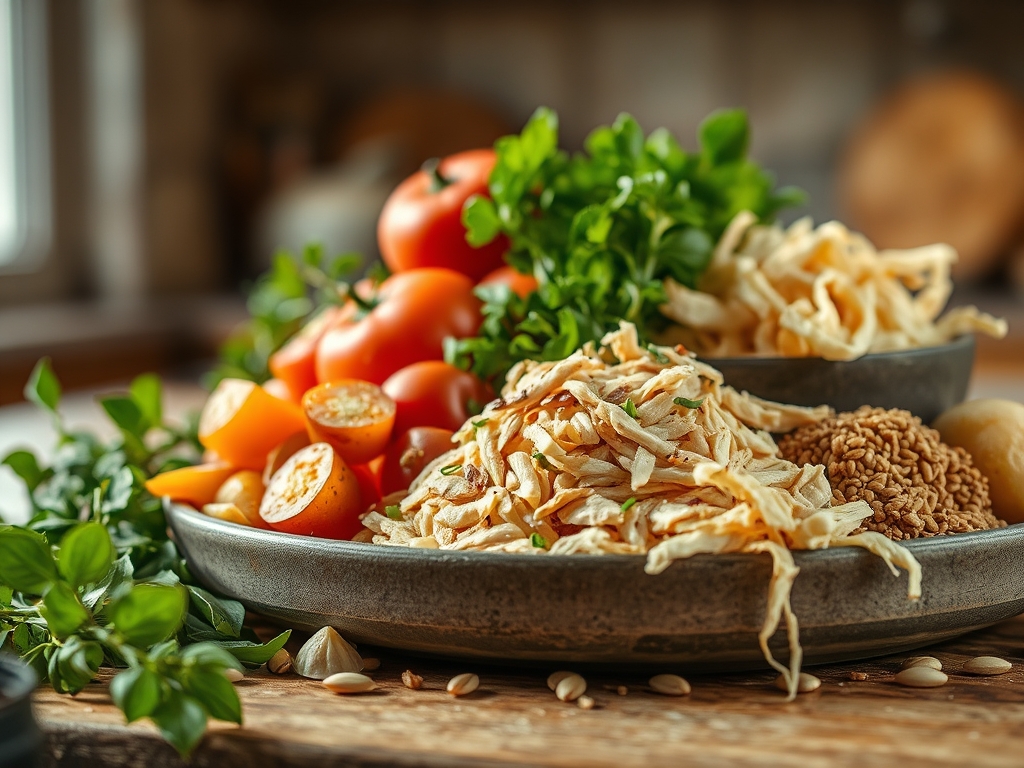
The Gathers:
Before we ignite the burner, we must respect the mise-en-place. For our shredded chicken and potato recipes, the quality of your starch is paramount. Reach for Yukon Gold potatoes if you want a buttery, waxier texture that holds its shape during a long simmer. If you are looking for maximum fluff and starch release for a mash-based blend, the Russet is your best friend. Its high amylose content ensures a light, airy finish when passed through a ricer.
For the chicken, use a mix of breast and thigh meat. The thighs contain more connective tissue and fat, which render down to provide a luscious, viscous coating for the potatoes. You will need a sharp chef's knife for dicing, a microplane for zesting aromatics, and a digital scale to ensure your ratios are precise.
Smart Substitutions: If you are avoiding nightshades, swap the potatoes for parsnips or celery root. These root vegetables offer a similar density but with a more herbaceous profile. For a leaner protein profile, turkey breast functions as a direct structural substitute for chicken, though it requires a slightly higher moisture content in your sauce to prevent desiccation.
The Clock: Mastering the Chef's Flow
Efficiency in the kitchen is about overlapping tasks to respect the "Chef's Flow." Total active prep time for these nine variations averages 20 minutes, with a thermal processing time of 30 to 45 minutes depending on your heat source.
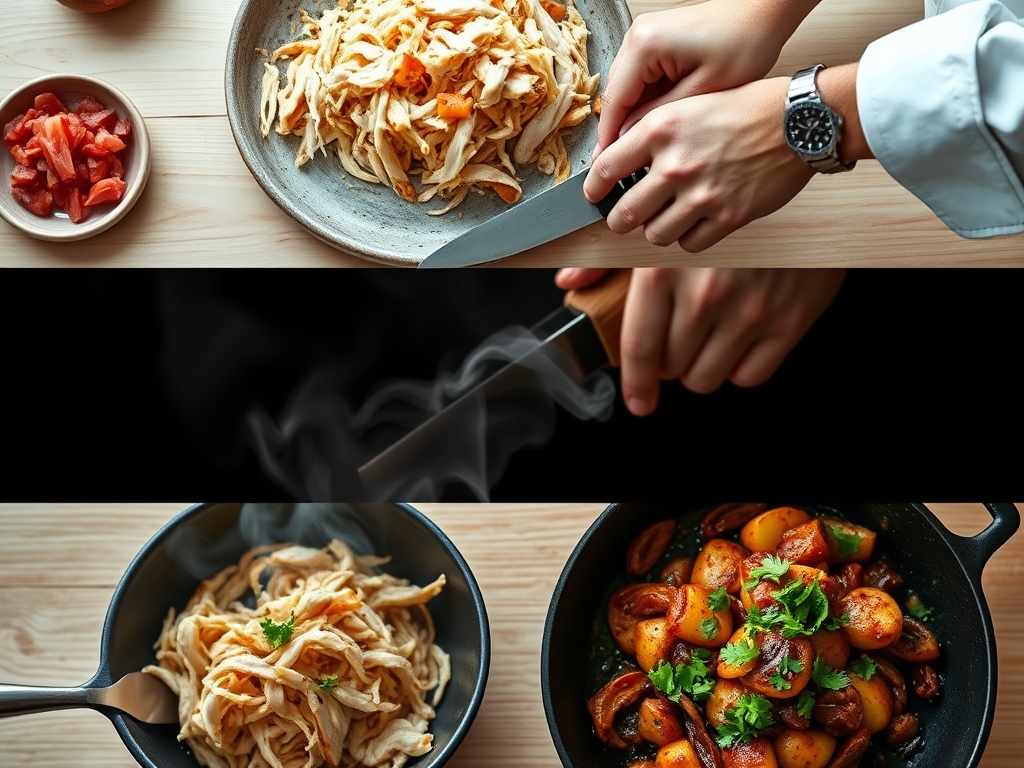
Start by hydrating your chicken. If you are starting from raw, a 15-minute brine in a 5 percent salt solution will denature the proteins just enough to retain moisture during the shredding process. While the chicken poaches or roasts, use your bench scraper to clear your station as you dice the potatoes. By the time the potatoes have reached the parboiled stage, your chicken will be ready to shred. This synchronization ensures that neither component sits long enough to lose its structural integrity or develop an unappealing skin.
The Masterclass:
1. The Initial Sear and Render
Place your chicken in a preheated heavy-bottomed skillet with a high-smoke-point oil like avocado oil. We are looking for the Maillard reaction here. This is the chemical reaction between amino acids and reducing sugars that creates that deep, savory crust.
Pro Tip: Do not crowd the pan. Overcrowding leads to steam buildup, which prevents browning and results in grey, rubbery meat. Give each piece space to breathe so the moisture can evaporate instantly.
2. Deglazing the Fond
Once the chicken is removed, you will see brown bits stuck to the bottom of the pan. This is "fond," and it is concentrated flavor. Pour in a splash of dry white wine or chicken stock and use a wooden spoon to scrape it up.
Pro Tip: This process is called deglazing. The acidity in the wine helps dissolve the proteins, creating a complex base for your potato sauce that a simple water-based liquid cannot replicate.
3. The Potato Parboil
Add your cubed potatoes to a pot of cold, salted water and bring to a boil. Starting with cold water ensures the potatoes cook evenly from the center out to the edge.
Pro Tip: Add a teaspoon of baking soda to the water. This breaks down the potato's pectin, creating a starchy slurry on the surface that becomes incredibly crispy when later roasted or sautéed with the chicken.
4. Integrating the Shreds
Use two forks or a stand mixer with the paddle attachment to shred your warm chicken. The heat makes the muscle fibers more pliable. Fold the chicken into your prepared potatoes while both are still warm to encourage flavor infusion.
Pro Tip: This is the "thermal carryover" phase. The residual heat from the potatoes will continue to soften the chicken fibers, allowing them to better absorb any added fats or aromatics.
5. The Final Emulsification
Add a fat source, such as grass-fed butter or heavy cream, and stir vigorously. We are looking to create an emulsion where the fat and the potato starch bind together into a smooth, cohesive sauce.
Pro Tip: Use a saucier for this step. The rounded bottom allows for constant motion, preventing the starch from scorching and ensuring the emulsion remains stable and glossy.
The Deep Dive:
When we look at the macro nutrition of shredded chicken and potato recipes, we see a balanced profile of complex carbohydrates and high-quality protein. A standard serving provides roughly 35 grams of protein and 40 grams of carbohydrates. To optimize this for different lifestyles, consider these swaps:
- Vegan/Vegetarian: Replace chicken with shredded king oyster mushrooms. They mimic the fibrous texture of chicken when pulled apart and seared.
- Keto: Swap potatoes for cauliflower florets. While the starch profile is different, the cauliflower provides a similar volume and picks up the flavors of the chicken beautifully.
- Gluten-Free: Potatoes are naturally gluten-free, but ensure your chicken broth or bouillon does not contain hidden wheat-based thickeners.
The Fix-It: Common Pitfalls
- Gummy Potatoes: This happens when you overwork the starch. If your blend feels like glue, you likely used a food processor. Always mash or fold by hand to keep the starch granules intact.
- Dry Chicken: If the chicken is chalky, it was overcooked. Fix this by folding in a few tablespoons of warm bone broth or a dollop of Greek yogurt to restore the lipid barrier.
- Bland Profile: If the dish lacks "pop," you need acid. A squeeze of fresh lemon or a teaspoon of apple cider vinegar will brighten the heavy starches and fats.
Meal Prep Science: To maintain "day-one" quality, reheat your chicken and potato blends in a pan over medium heat with a tablespoon of water. This creates a small steam chamber that rehydrates the starches without making the chicken "rubbery" as a microwave might.
The Wrap-Up:
Mastering shredded chicken and potato recipes is about understanding the dance between protein and starch. By controlling your temperatures and respecting the chemistry of the Maillard reaction and starch gelatinization, you transform humble pantry staples into a culinary masterpiece. Don't be afraid to experiment with different herbs like rosemary or smoked paprika to change the flavor profile. Now, get into that kitchen and start shredding!
The Kitchen Table:
How do I prevent my potatoes from turning brown?
Keep peeled potatoes submerged in cold water until you are ready to cook. This prevents oxidation, which occurs when the enzyme polyphenol oxidase reacts with oxygen. Adding a splash of lemon juice to the water further inhibits this enzymatic browning.
What is the best way to shred chicken quickly?
While forks work, a stand mixer with the paddle attachment is the professional secret. Place warm, cooked chicken in the bowl and run on low for 30 seconds. The paddle efficiently pulls the muscle fibers apart without pulverizing the meat.
Can I freeze shredded chicken and potato recipes?
Yes, but texture changes may occur. Potatoes can become slightly grainy upon thawing due to the breakdown of starch cells. To minimize this, ensure the dish is fully cooled before vacuum sealing to prevent ice crystal formation and freezer burn.
Why are my roasted potatoes not getting crispy?
You likely skipped the drying phase. After parboiling, let the potatoes steam-dry in a colander for three minutes. Removing surface moisture is essential because the energy of the pan must evaporate water before it can begin the browning process.