
Imagine the scent of slow-simmered onions and toasted peppercorns drifting through your hallway; it is the olfactory equivalent of a warm cashmere blanket. When you master pulled beef recipes oven techniques, you transform a stubborn, fibrous hunk of muscle into a pile of velvet. This is not just cooking; it is a slow-motion chemical heist where we trade heat and time for pure, unadulterated succulence. We are aiming for that specific, fork-tender moment where the meat practically sighs and falls away from itself. Forget the fast-track methods that leave you with chewy disappointment. We are going deep into the mechanics of the braise to ensure every fiber is saturated with flavor. Whether you are hosting a rowdy game night or just prepping for a week of high-protein indulgence, this is the definitive blueprint for success. Grab your favorite heavy-bottomed skillet and let us get started on the most rewarding project your kitchen has seen all year. It is time to turn your oven into a flavor-concentrating powerhouse.

The Gathers:
To achieve a truly viscous and rich sauce, your mise-en-place must be intentional. We start with the star: a three to four pound chuck roast. This cut is prized for its high intramuscular fat and connective tissue, which will render into gelatin during the long cook. You will need coarse kosher salt to properly denature the surface proteins and a high-smoke-point oil like avocado oil for the initial sear. For the aromatic base, gather three yellow onions, a head of garlic, and a bottle of dry red wine like Cabernet Sauvignon to deglaze the pan.
Smart Substitutions: If you are avoiding alcohol, a mix of beef bone broth and two tablespoons of apple cider vinegar provides the necessary acidity to brighten the heavy fats. For a piquant kick, swap standard paprika for smoked Spanish pimenton. If you do not have a microplane for your garlic, a heavy chef's knife and a sprinkle of salt can be used to grind the cloves into a fine paste. Always use a digital scale for your dry spices to ensure consistency; volume measurements are notoriously unreliable for high-intensity rubs.
The Clock
Efficiency in the kitchen relies on "Chef's Flow," which is the art of overlapping tasks to minimize downtime. Your active prep time is approximately thirty minutes. This includes trimming the silver skin, searing the meat, and sautéing the aromatics. The "passive" phase is where the magic happens; the beef will spend between three and a half to four hours in the oven at a steady 300 degrees Fahrenheit.
The final phase involves a thirty-minute rest period. This is non-negotiable. During this time, the internal pressure of the meat stabilizes, allowing the juices to redistribute rather than spilling out onto your cutting board. Total time from fridge to table is roughly five hours. Plan to start in the early afternoon for a dinner that feels effortless.

The Masterclass
1. The Aggressive Sear
Dry your beef thoroughly with paper towels. Heat your heavy-bottomed skillet until the oil shimmers. Place the meat in the pan and do not move it for four minutes per side. You are looking for a deep, mahogany crust.
Pro Tip: This is the Maillard reaction in action. By creating a complex network of flavor compounds through high-heat browning, you provide the foundational "umami" that defines the entire dish.
2. Deglazing the Fond
Remove the meat and toss in your sliced onions. Once they soften, pour in your liquid. Use a wooden spoon or a bench scraper to scrape up every brown bit stuck to the bottom of the pan.
Pro Tip: Those brown bits, known as fond, are concentrated proteins and sugars. Dissolving them into your braising liquid creates a deep, multi-dimensional sauce that water alone could never achieve.
3. The Low and Slow Braise
Transfer the meat and liquid into a Dutch oven. Ensure the liquid comes halfway up the side of the beef. Cover tightly with a lid or a double layer of foil to prevent evaporation.
Pro Tip: Maintaining a tight seal prevents evaporative cooling. If steam escapes, the internal temperature of the pot drops, and the collagen will not break down into gelatin properly.
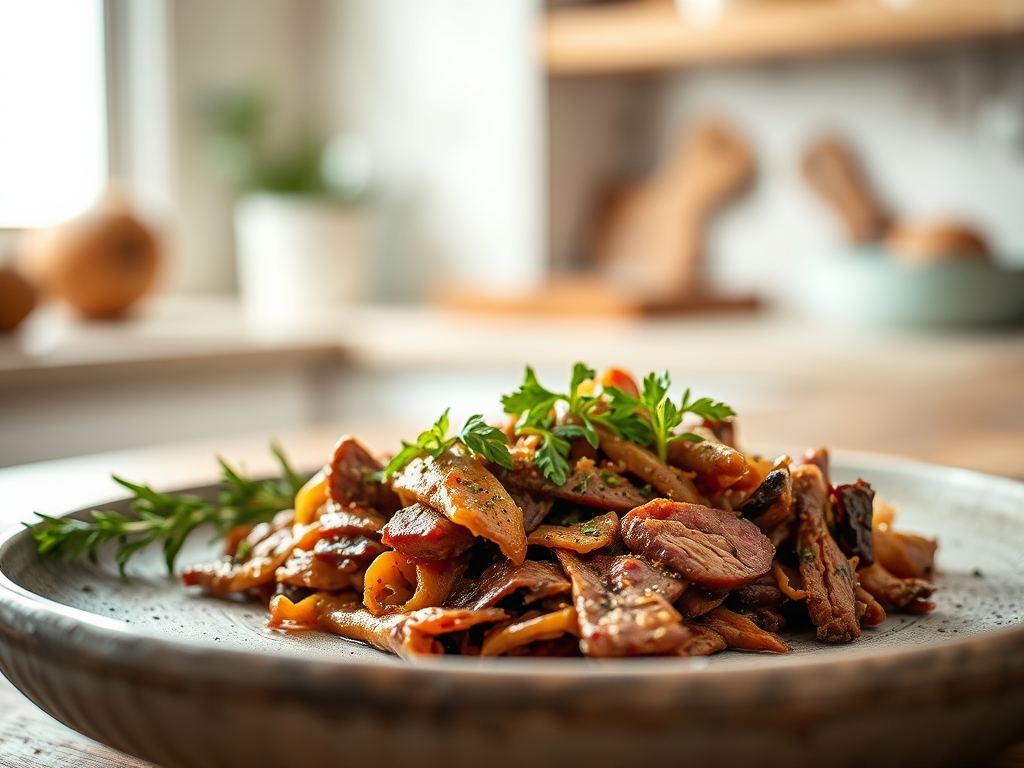
4. The Shredding Technique
Once the meat registers 205 degrees Fahrenheit on a digital thermometer, remove it from the oven. Use two large forks or specialized meat claws to pull the grains apart.
Pro Tip: Shredding while the meat is hot allows the surface area to increase, which lets the fibers soak up the remaining braising liquid like a sponge through capillary action.
5. Emulsifying the Sauce
Strain the remaining liquid into a saucier. Simmer it over medium heat until it reduces by half, then whisk in a knob of cold butter.
Pro Tip: This creates a temporary emulsion. The fat in the butter binds with the water-based sauce, creating a glossy, velvet-like texture that clings to the beef fibers.
The Deep Dive
From a macro nutrition perspective, pulled beef is a powerhouse of bioavailable iron, zinc, and Vitamin B12. A standard six-ounce serving contains roughly 45 grams of protein and 28 grams of fat. To keep this Keto-friendly, serve it over cauliflower mash. For a vegan alternative, use the same aromatic and braising technique with king oyster mushrooms or young green jackfruit; the texture is shockingly similar.
The Fix-It:
- Meat is tough: It likely has not reached 205 degrees. Put it back in for thirty minutes. Collagen needs time and specific heat to melt.
- Too salty: Add a peeled, halved potato to the liquid for the last twenty minutes. It will act as a sponge for excess sodium.
- Greasy sauce: Use a fat separator or chill the liquid so the fat solidifies on top for easy removal.
Meal Prep: To maintain "day-one" quality, store the beef in its own juices. When reheating, do so gently in a covered pan with a splash of broth. This prevents the proteins from tightening and becoming "rubbery" in the microwave.
The Wrap-Up
You now hold the keys to the kingdom of comfort food. By understanding the relationship between collagen breakdown and thermal consistency, you have graduated from a recipe-follower to a culinary scientist. This pulled beef is more than a meal; it is a versatile component for tacos, sandwiches, or high-end ragus. Go forth, sear with confidence, and let the oven do the heavy lifting while you take all the credit.
The Kitchen Table
What is the best cut for pulled beef?
The chuck roast is superior due to its high fat content and connective tissue. These elements melt during the slow-cooking process, providing the essential moisture and "pull" required for the perfect texture.
Can I cook this at a higher temperature?
Avoid going above 325 degrees. High heat causes muscle fibers to contract violently, squeezing out moisture before the collagen has a chance to liquefy. Low and slow is the only way to ensure tenderness.
Why is my pulled beef dry?
Dryness usually occurs if the meat was boiled rather than braised, or if it was shredded and left exposed to air without its cooking juices. Always store and serve the beef in its reduced braising liquid.
Do I have to sear the meat first?
Searing is essential for flavor. It initiates the Maillard reaction, creating complex savory notes that cannot be developed through simmering alone. Skipping this step results in a flat, one-dimensional flavor profile.