
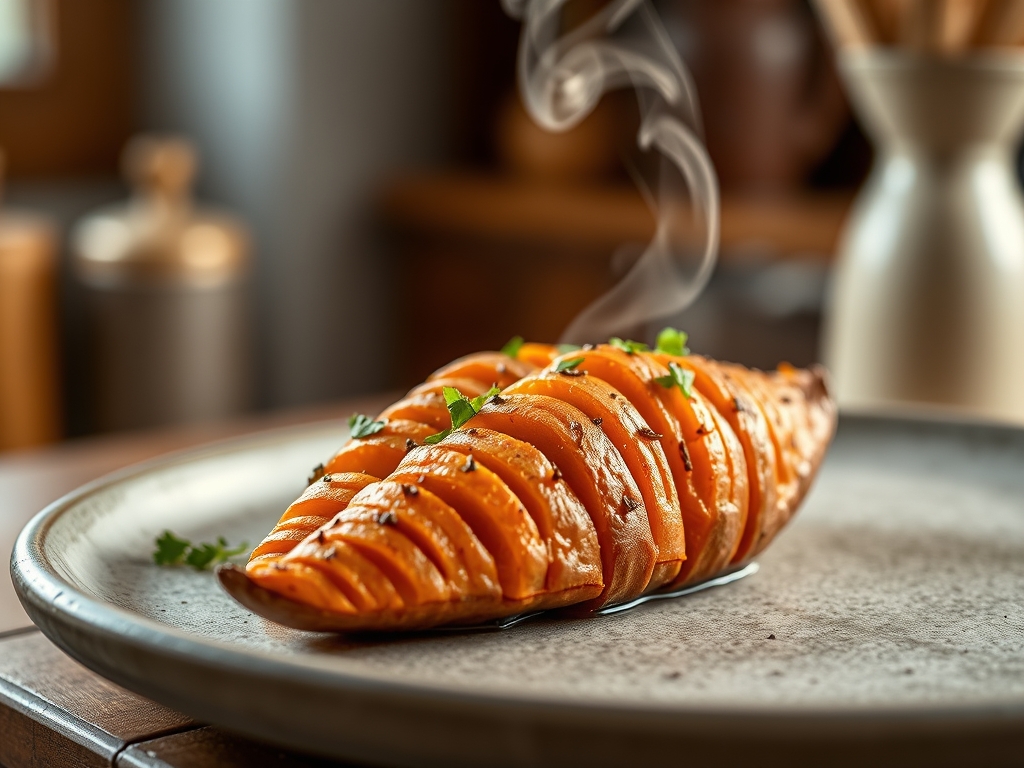
Imagine a kitchen filled with the scent of caramelized natural sugars and toasted sage; this is the sensory payoff of mastering hasselback sweet potato recipes. These tubers are the architectural marvels of the vegetable world. They offer a rhythmic visual appeal that promises a textural contrast between a crispy, accordion-style exterior and a creamy, velvet interior.
The magic happens when you transform a humble root vegetable into a centerpiece. We are moving beyond the basic baked potato into a realm where surface area is king. By increasing the exposed flesh through precise incisions, we create more opportunities for the Maillard reaction to occur. This chemical dance between amino acids and reducing sugars produces that deep, savory umami flavor we crave. Whether you are hosting a formal gala or a cozy Sunday dinner, these potatoes are the ultimate flex of your culinary prowess. They are sophisticated, structurally sound, and deceptively simple once you understand the physics of the slice. Let us dive into the chemistry of the crunch and the soul of the spud.
The Gathers:
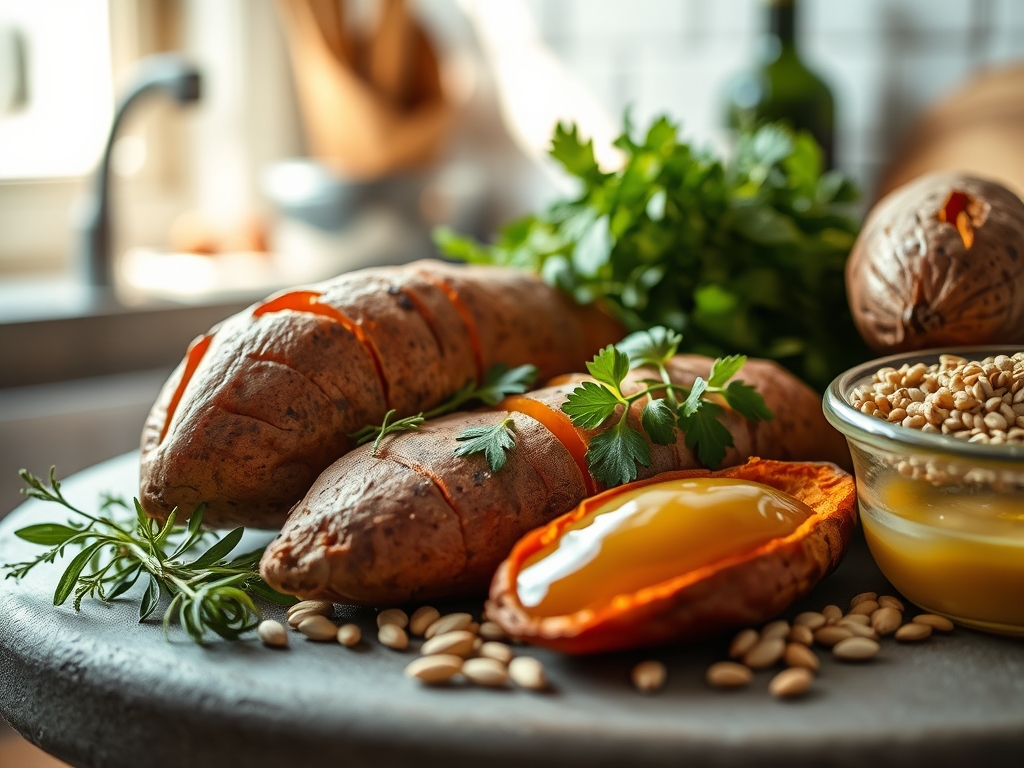
To achieve a restaurant-grade result, your mise-en-place must be intentional. Start with medium-sized Garnet or Jewel sweet potatoes; their high moisture content ensures the interior remains viscous rather than chalky. You will need a high-quality fat, such as clarified butter (ghee) or a cold-pressed avocado oil, to withstand the high thermal demands of the oven without reaching its smoke point.
Gather your aromatics: fresh rosemary, thyme, and three cloves of garlic. You will also need a microplane for zest and a digital scale to ensure your salt ratios are precise. Salt is not just for flavor; it is a desiccant that draws out surface moisture to encourage browning.
Smart Substitutions:
If you are avoiding dairy, a refined coconut oil provides the necessary saturated fats for a crisp finish without a tropical aftertaste. For a piquant kick, swap standard sea salt for smoked Maldon flakes or a dusting of nutritional yeast to add a cheesy, non-dairy depth. If you lack a traditional chef's knife, a sharp serrated utility knife can actually provide better grip on the slippery skin of the potato during the initial cuts.
The Clock: Chef's Flow
Efficiency in the kitchen is about managing the "dead time" while the oven does the heavy lifting. Total preparation time is approximately 15 minutes, while the total cook time ranges from 50 to 65 minutes depending on the density of your tubers.
The Chef's Flow involves a three-phase approach. Phase one is the prep (15 minutes), where you slice and infuse your fats. Phase two is the initial roast (30 minutes) to soften the internal starch structure. Phase three is the "basting bloom" (25 minutes), where you aggressively coat the opened fans with seasoned fat to achieve maximum crispness. Always allow for a 5-minute rest period post-bake; this allows for thermal carryover to finish the center without drying out the edges.
The Masterclass:
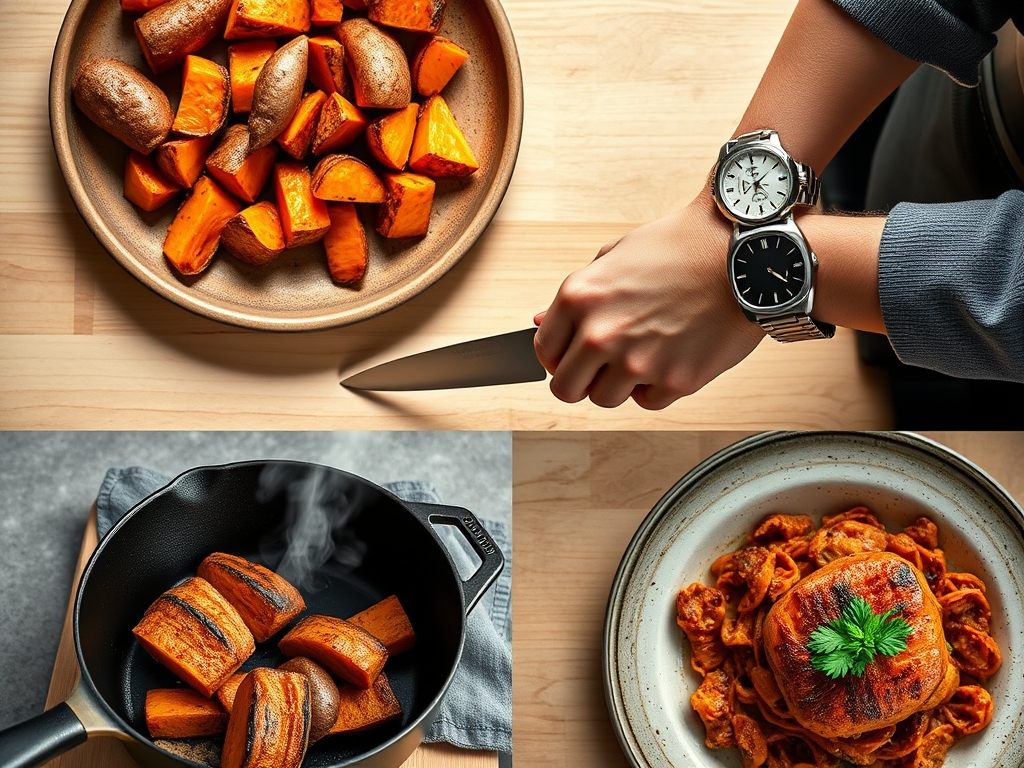
1. The Precision Cut
Place your potato between two wooden spoons or chopsticks. Using a sharp chef's knife, slice downward until the blade hits the wood. This prevents you from cutting all the way through the base. Aim for slices that are 1/8th of an inch thick.
Pro Tip: This technique utilizes mechanical structural integrity. By leaving the bottom third of the potato intact, you create a heat-conducting base that allows the "fins" to expand without the vegetable collapsing.
2. The Initial Thermal Shock
Rub the potato with a light coating of oil and a pinch of salt. Place them on a parchment-lined baking sheet and roast at 425 degrees Fahrenheit.
Pro Tip: High initial heat triggers starch gelatinization. The moisture inside the potato turns to steam, softening the pectin cell walls so the slices can fan out naturally as they cook.
3. The Infused Fat Render
While the potatoes roast, melt your ghee in a saucier over low heat. Add your bruised herbs and smashed garlic. Let them infuse for ten minutes, then strain.
Pro Tip: This is a fat-soluble flavor extraction. The essential oils in the herbs are hydrophobic, meaning they bind more effectively to the lipids in the butter than they would to the water-heavy potato flesh.
4. The Basting Bloom
At the 30-minute mark, remove the potatoes. Use tongs to gently wiggle the slices apart and brush the infused fat generously into every crevice.
Pro Tip: This increases the surface-to-volume ratio. By coating the individual slices, you are essentially shallow-frying each "leaf" of the potato within the oven's convection environment.
5. The Final Crisp
Return the potatoes to the oven for the final 20 to 25 minutes. The edges should become translucent and then golden brown.
Pro Tip: This stage focuses on the Maillard reaction. The sugars in the sweet potato concentrate as water evaporates, leading to a complex flavor profile that is far superior to a standard boiled or mashed prep.
The Deep Dive:
Macro Nutrition:
Sweet potatoes are a powerhouse of complex carbohydrates and Vitamin A (beta-carotene). A medium hasselback potato typically contains 160 calories, 4 grams of fiber, and zero fat before you add your basting agents. Because they are low on the glycemic index compared to white potatoes, they provide sustained energy without the insulin spike.
Dietary Swaps:
- Vegan: Use a high-quality extra virgin olive oil or vegan butter alternative.
- Keto: While sweet potatoes are higher in carbs, you can apply this hasselback technique to large radishes or zucchini for a similar textural experience.
- Gluten-Free: This recipe is naturally gluten-free; just ensure any store-bought spice blends do not contain anti-caking agents derived from grain.
The Fix-It: Troubleshooting Pitfalls
- The Snap: If the potato breaks in half, use a metal skewer to thread the pieces back together before roasting. The starch will act as a natural glue as it cooks.
- Soggy Fins: This happens if the oven temperature is too low. Ensure your oven is calibrated with an internal thermometer; 425F is the sweet spot for moisture evaporation.
- Burnt Bottoms: If the base darkens too quickly, move the baking sheet to a higher rack or double-stack your baking pans to create an air gap.
Meal Prep Science:
To reheat, avoid the microwave as it turns the crisp edges into rubber. Instead, use an air fryer at 350F for 5 minutes. This re-dehydrates the surface while maintaining the creamy interior, effectively restoring that "day-one" quality.
The Wrap-Up:
Mastering hasselback sweet potato recipes is about more than just a side dish; it is about understanding how heat and fat interact with plant biology. By using a few professional tools like a bench scraper for cleanup and a saucier for your infusions, you elevate your kitchen game to a professional level. These potatoes are a testament to the fact that with the right technique, even the most basic ingredients can become extraordinary. Now go forth, slice with confidence, and let those potatoes fan out in all their golden glory.
The Kitchen Table:
How do I stop my potatoes from rolling while I slice?
Slice a very thin sliver off the bottom of the potato to create a flat, stable base. This prevents the tuber from shifting under your knife, ensuring uniform slices and preventing accidental cuts to your fingers.
Can I prep these potatoes ahead of time?
Yes, you can slice them up to 24 hours in advance. To prevent enzymatic browning (oxidation), submerge the sliced potatoes in a bowl of cold water mixed with a teaspoon of lemon juice or vinegar.
What is the best knife for hasselback potatoes?
A sharp 8-inch chef's knife is ideal for control. The weight of the blade helps glide through the dense starch of the sweet potato, while the pointed tip allows for precision near the guide spoons.
Why are my hasselback potatoes not fanning out?
The slices must be thin enough to lose their rigidity during the first roast. If they stay clumped, use a bench scraper or butter knife to gently pry them open halfway through the cooking process.
What toppings work best for a savory version?
After the final bake, garnish with crumbled feta, toasted pepitas, and a drizzle of tahini. The acidity of the cheese and the creaminess of the tahini perfectly balance the inherent sweetness of the roasted tuber.