
Picture the sizzle of a heavy-bottomed skillet meeting cold fat; it is the sound of a weekday rescue mission. When life gets chaotic, you need quick easy ground beef recipes with few ingredients that do not sacrifice the complex, savory depth of a slow-cooked meal. We are stripping away the fluff to focus on the raw chemistry of protein and heat.
Ground beef is the ultimate culinary chameleon. It is a dense matrix of muscle fibers and intramuscular fat that, when handled with precision, transforms into a silk-textured ragu or a crusty, caramelized smash burger. You do not need a pantry full of exotic spices to make this happen. You only need a basic understanding of how heat interacts with amino acids. By mastering just a few core techniques, you can turn a simple pound of chuck into a masterpiece of texture and flavor. We are moving beyond basic "hamburger helper" territory into a world where three or four components work in perfect synergy to create something truly spectacular. Grab your favorite apron; we are about to turn your kitchen into a high-efficiency flavor laboratory.
The Gathers:
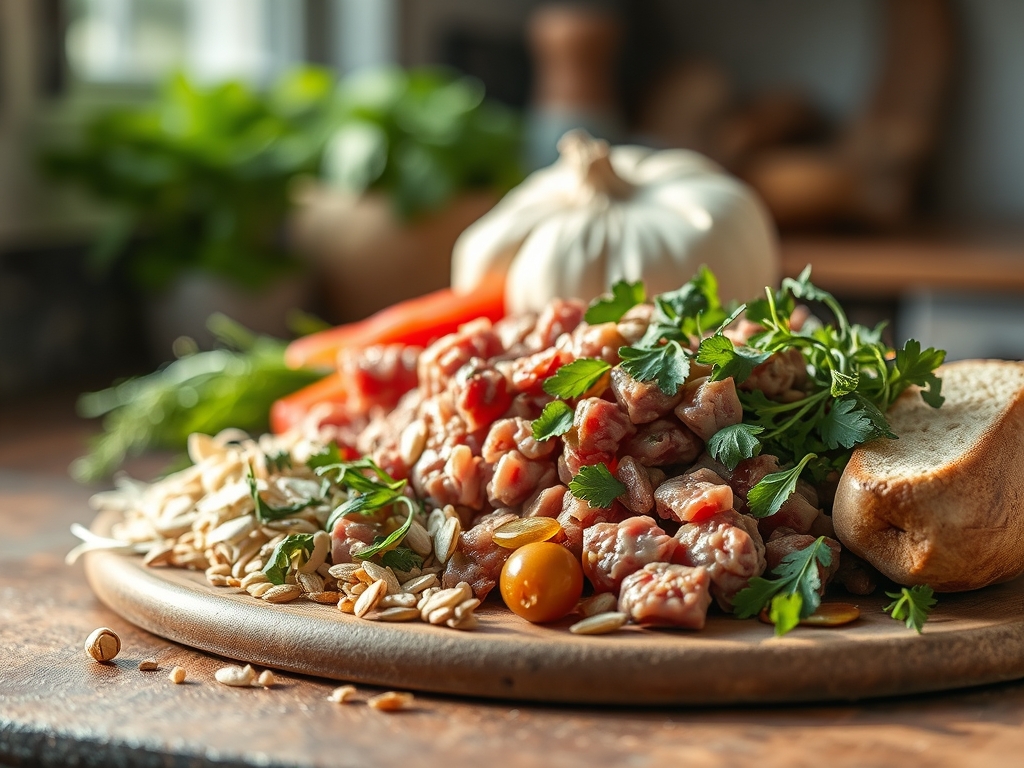
To execute these hacks, your mise-en-place must be tight. Start with high-quality ground beef, preferably a 20 percent fat blend. This ratio is critical because the fat acts as a solvent for flavor compounds and provides the necessary lubrication for a tender mouthfeel. You will also need a high-smoke-point oil, like avocado or grapeseed, to facilitate the Maillard reaction without the bitter notes of burnt lipids.
Your toolkit is just as vital as your ingredients. Ensure you have a digital scale for precise portioning; this prevents uneven cooking times. A microplane is essential for aerating hard cheeses or aromatics like garlic and ginger, allowing them to dissolve into the beef fat almost instantly. Keep a bench scraper nearby to keep your workspace clean and to move prepped items into the pan with professional speed.
Smart Substitutions: If you are out of fresh aromatics, a splash of fish sauce or Worcestershire provides an instant hit of umami without adding volume. If you lack a heavy-bottomed skillet, a cast iron pan is your best friend for heat retention. For those looking to lighten the profile, ground turkey or bison can be substituted, though you must add a teaspoon of neutral oil to compensate for the lower fat content and prevent the proteins from seizing.
The Clock:
Efficiency in the kitchen is about "Chef's Flow," which is the art of overlapping tasks to minimize downtime. For these hacks, the active prep time is rarely more than five to seven minutes. The cooking phase generally lasts ten to twelve minutes, depending on how much moisture you need to evaporate.
The secret to speed is pre-heating. Your skillet should be radiating heat before the beef even touches the surface. While the pan heats, use your bench scraper to mince your garlic or shallots. By the time the beef is browning, you should be measuring your liquids. This synchronized approach ensures that by the time the timer dings at the fifteen-minute mark, you are already plating your meal rather than just starting the sauce.
The Masterclass:
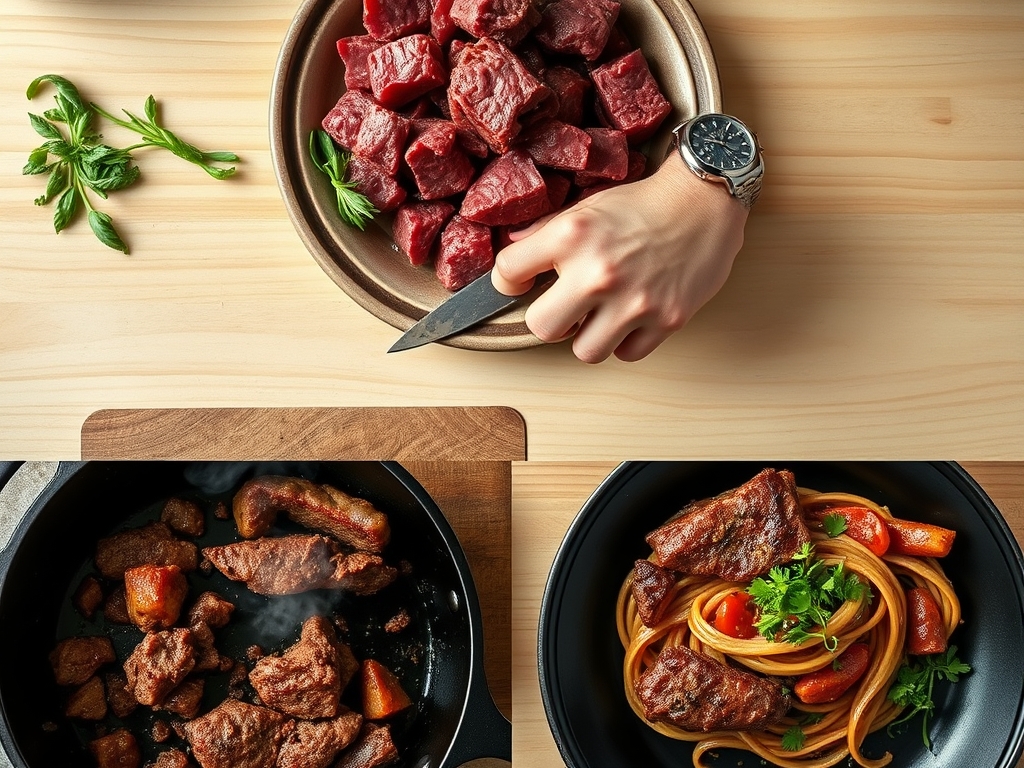
1. The High-Heat Sear
Place your beef in a ripping hot skillet and do not touch it for three minutes. This allows the surface to undergo enzymatic browning, creating a crust of complex flavor molecules.
Pro Tip: This is the Maillard reaction in action; moving the meat too early prevents the sugars and amino acids from bonding, resulting in grey, steamed meat rather than a savory crust.
2. The Deglaze Maneuver
Once the meat is browned, use a splash of stock or wine to lift the "fond" (the brown bits) from the bottom of the pan. Use a wooden spoon or tongs with a paper towel to scrape the surface.
Pro Tip: Deglazing utilizes the principle of solubility; the flavorful compounds stuck to the pan are alcohol and water-soluble, and incorporating them back into the beef creates a deep, viscous sauce.
3. The Fat Render
Cook the beef until the fat turns clear and begins to bubble. This process, known as rendering, separates the liquid fat from the connective tissue.
Pro Tip: Proper rendering is essential for texture; if you add liquid too early, you end up with a greasy emulsion rather than a clean, beefy flavor profile.
4. The Aromatic Infusion
Push the beef to the edges of the pan and drop your aromatics into the center. Let them bloom in the rendered fat for sixty seconds until they become piquant and fragrant.
Pro Tip: Fat is a highly effective flavor carrier; by "blooming" spices in the beef fat, you are creating a fat-soluble flavor base that coats every fiber of the meat.
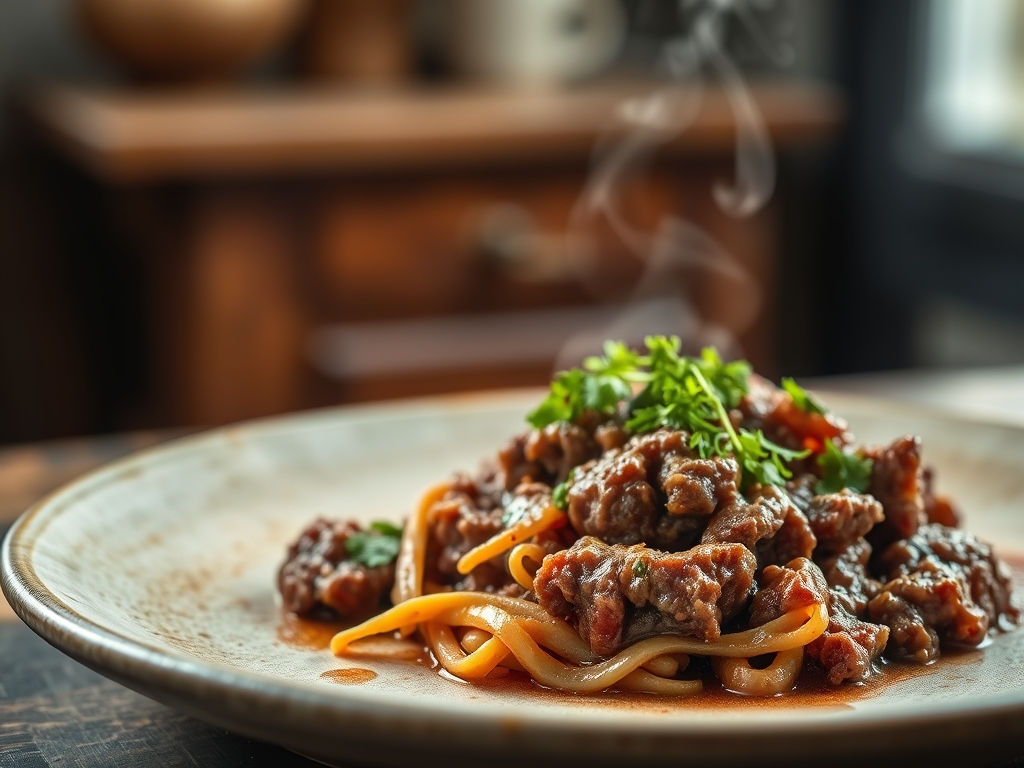
5. The Emulsified Finish
Add a tablespoon of cold butter or a splash of heavy cream at the very end of the cooking process, whisking vigorously with a saucier or spoon.
Pro Tip: This creates a temporary emulsion, thickening the juices into a velvety glaze that clings to the beef, providing a luxurious mouthfeel without the need for flour or cornstarch.
6. The Rest and Carryover
Remove the pan from the heat when the beef is just slightly underdone. Let it sit for two minutes before serving.
Pro Tip: This accounts for thermal carryover; the internal temperature will continue to rise by several degrees, ensuring the meat stays juicy rather than becoming overcooked and grainy.
7. The Acid Balance
Finish the dish with a squeeze of lemon or a teaspoon of vinegar. This cuts through the richness of the rendered fat.
Pro Tip: Acid acts as a flavor enhancer by stimulating the salivary glands, which helps your taste buds perceive the savory notes of the beef more intensely.
8. The Texture Contrast
Top your beef with something crunchy, like toasted panko or sliced scallions, just before serving.
Pro Tip: Sensory contrast is a key pillar of food science; the juxtaposition of soft, savory beef and a crisp topping creates a more satisfying neurological response during consumption.
9. The Aerated Garnish
Use a microplane to shower the dish with zest or hard cheese from a height.
Pro Tip: Grating cheese finely increases its surface area, allowing it to melt almost instantly upon contact with the warm beef, creating a consistent flavor profile in every bite.
The Deep Dive:
From a nutritional standpoint, ground beef is a powerhouse of bioavailable iron, B12, and zinc. A standard four-ounce serving provides roughly 21 grams of protein. To keep it Keto, serve your beef over riced cauliflower or zoodles. For a Vegan swap, use a pea-protein crumble and increase the amount of umami additives like soy sauce or mushroom powder to mimic the beef's depth.
The Fix-It:
- Grey Meat: Your pan wasn't hot enough. Solution: Remove the meat, wipe the pan, reheat until smoking, and sear in smaller batches.
- Too Much Liquid: The beef is "boiling" in its own juices. Solution: Drain the excess liquid into a bowl, reduce it separately, and then add it back as a concentrated glaze.
- Grainy Texture: The meat was over-handled. Solution: Next time, do not over-mix the raw beef; keep the strands loose to preserve the fat pockets.
Meal Prep: When reheating ground beef, the goal is to prevent oxidation. Reheat in a skillet with a tablespoon of water or stock and cover with a lid. This creates steam that gently warms the protein without drying it out, maintaining that "day-one" quality.
The Wrap-Up:
Mastering these hacks turns a humble pound of beef into a gourmet experience. By focusing on the science of the sear and the logic of the deglaze, you can create meals that feel intentional and sophisticated. Remember, the best cooking isn't about the number of ingredients; it is about how you treat the ones you have. Go forth, use your heavy-bottomed skillet with confidence, and enjoy the delicious results of your culinary chemistry!
The Kitchen Table:
How do I prevent ground beef from sticking to the pan?
Ensure the pan is fully pre-heated before adding fat. Once the oil shimmers, add the beef. The protein will naturally release from the surface once a proper crust has formed through the Maillard reaction.
What is the best way to drain excess grease?
Tilt the skillet and use a spoon to ladle out the liquid fat into a heat-safe container. Alternatively, use tongs to hold a wadded paper towel and carefully blot the excess rendered fat from the pan.
Can I cook ground beef straight from the freezer?
It is not recommended for these hacks. Thawing ensures even heat distribution. If you must, use a low-heat defrost setting or submerge the sealed package in cold water to maintain the structural integrity of the protein fibers.
Why does my ground beef taste bland?
You likely missed the salt or the acid. Salt enhances the natural savory notes, while a splash of vinegar or citrus at the end brightens the flavors and balances the heavy, rendered fats of the beef.