
Steam rises from the rim of a ceramic mug, carrying the scent of toasted sesame and sharp ginger directly to your senses. We are moving past the era of sad, dry poultry and entering the age of the microwave marvel. These cup chicken recipes are designed for the high-octane life where time is a luxury but flavor is a non-negotiable requirement. Whether you are a student in a dorm or a professional with ten minutes between meetings, these recipes deliver a concentrated punch of protein and spice. We are talking about succulent, bite-sized pieces of thigh or breast meat, cooked to perfection in a vessel you usually reserve for coffee. It is fast, it is efficient, and it is scientifically sound.
The Gathers:
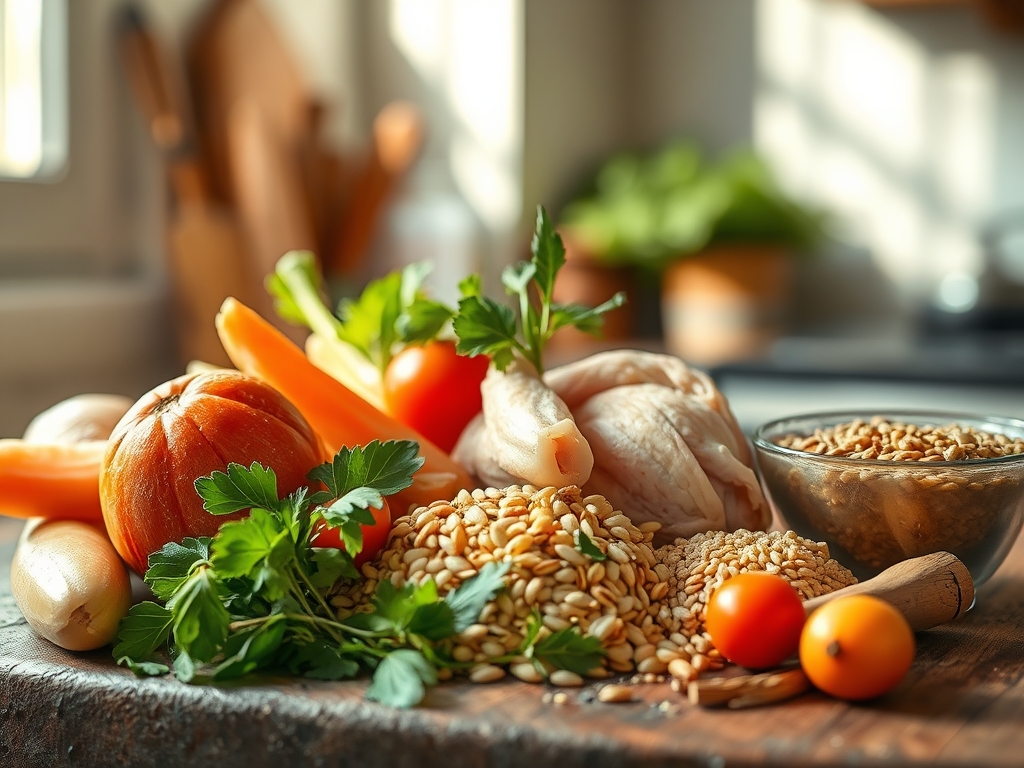
To master these cup chicken recipes, your mise-en-place must be precise. Start with high-quality protein. I recommend boneless, skinless chicken thighs for their higher fat content and resistance to overcooking, though lean breast meat works if you monitor the internal temperature. You will need a microplane to create a fine paste of aromatics like garlic and ginger. This increases the surface area, allowing the volatile oils to infuse the cooking liquid almost instantly.
For the liquid components, keep a bottle of low-sodium soy sauce, toasted sesame oil, and rice vinegar nearby. These provide the salty, fatty, and acidic trifecta necessary for a balanced palate. If you are looking for a viscous glaze, cornstarch or arrowroot powder is your best friend. For a "Smart Substitution," swap the soy sauce for coconut aminos if you are avoiding soy; it offers a similar piquant depth with a hint of sweetness. If you lack fresh ginger, a pinch of ground ginger provides the heat but lacks the bright citrus notes of the fresh root. Use a digital scale to measure your chicken in 150-gram increments to ensure consistent cooking times across all six variations.
The Clock
The beauty of the "Chef's Flow" in cup chicken recipes is the elimination of dead time. Preparation takes exactly five minutes if your knife skills are sharp. You spend two minutes dicing the chicken into uniform 1.5-centimeter cubes and three minutes whisking your aromatics in a small saucier or prep bowl. The cooking phase is a brief three to four-minute window. By the time you have wiped down your cutting board with a bench scraper, the microwave timer is chiming. Total elapsed time from fridge to fork is under ten minutes. This efficiency relies on the microwave's ability to excite water molecules within the meat, cooking it from the inside out while the sauce thickens via starch gelatinization.
The Masterclass
1. The Precision Cut
Slice your chicken into uniform cubes. Consistency is the secret to avoiding the dreaded "rubber chicken" syndrome where small pieces overcook before large pieces are safe to eat. Use a sharp chef's knife to ensure clean edges, which helps the meat retain its natural juices during the rapid heating process.
Pro Tip: This is about surface-to-volume ratio. Smaller cubes cook faster, but they also lose moisture quicker. Keeping them at 1.5 centimeters allows for thermal carryover to finish the center without dehydrating the exterior.
2. The Emulsion Whisk
In your mug, combine your liquid base (soy, broth, or coconut milk) with your thickener and aromatics. Use a small whisk or a fork to aerate the mixture slightly. You want a homogenous liquid so the starch does not settle at the bottom of the cup, which would result in a scorched base and a thin sauce.
Pro Tip: Adding a teaspoon of oil or butter creates a temporary emulsification. This fat coat protects the chicken fibers from the aggressive agitation of boiling water molecules, keeping the meat tender.
3. The Aromatics Infusion
Fold the chicken into the sauce, ensuring every piece is submerged. This is where you add the "heavy hitters" like chili flakes, minced garlic, or lemongrass. The narrow shape of the mug forces the steam to circulate through the chicken, deeply embedding the flavors into the protein.
Pro Tip: The science of infusion is accelerated by heat. As the liquid warms, the cell walls of the garlic and ginger break down, releasing essential oils that would normally take hours to permeate the meat in a cold marinade.
4. The Controlled Blast
Place a vented lid or a paper towel over the mug to trap steam. Microwave on high power in sixty-second intervals. Between each interval, use tongs or a spoon to stir the contents. This redistributes the heat, as microwaves often have "hot spots" that can cook one side of the cup faster than the other.
Pro Tip: Stirring prevents the starch from clumping and ensures even enzymatic browning of any sugars in the sauce, even without a traditional flame.
5. The Rest and Glaze
Once the chicken is opaque and firm, remove it from the microwave. Let it sit for two minutes. This is the most ignored yet vital step. The residual heat continues to cook the center of the meat gently, while the sauce thickens as it cools slightly, clinging to the chicken in a glossy, professional-looking glaze.
Pro Tip: This resting period allows the protein fibers to relax and reabsorb some of the expressed juices. If you cut into it immediately, the moisture escapes, leaving the chicken dry.
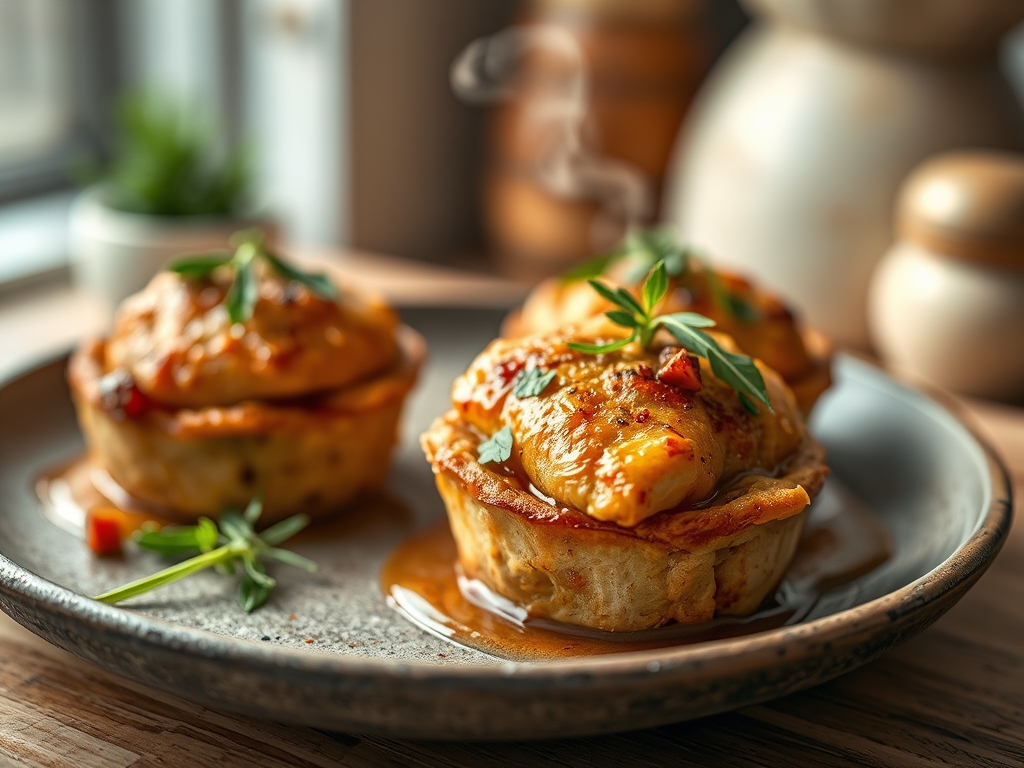
6. The Final Garnish
Top your creation with fresh scallions, toasted sesame seeds, or a squeeze of lime. These fresh additions provide a textural contrast to the soft chicken and a bright hit of acidity to cut through the richness of the sauce.
Pro Tip: Adding fresh herbs at the very end preserves their volatile compounds. Heat destroys the delicate oils in cilantro and basil, so always keep them as a "cold finish" for maximum aromatic impact.
The Deep Dive
From a nutritional standpoint, these cup chicken recipes are a powerhouse. A standard 150-gram serving of chicken thigh provides roughly 30 grams of protein and 12 grams of fat. If you are following a Keto lifestyle, swap the cornstarch for xanthan gum to keep the carbs near zero. For a Vegan twist, firm tofu or seitan cubes work beautifully, though you should reduce the cooking time by thirty percent to avoid a "spongy" texture.
"The Fix-It" guide for common pitfalls:
- The Sauce is Watery: You likely skipped the starch or didn't cook it long enough for the molecules to swell. Add a half-teaspoon of cornstarch slurry and microwave for another 20 seconds.
- The Chicken is Tough: You overcooked it. Next time, use a digital scale to ensure your portions aren't too small for the power of your microwave.
- The Flavor is Flat: It needs acidity. A splash of rice vinegar or lime juice will brighten the dish instantly.
For meal prep, you can dice the chicken and mix the sauce in advance, storing them in separate airtight containers. When you are ready to eat, combine them in the mug. Reheating "day-one" quality involves adding a teaspoon of water before microwaving to create fresh steam, preventing the protein from becoming "leathery" during the second heating cycle.
The Wrap-Up
Mastering cup chicken recipes is like having a culinary superpower in your back pocket. It proves that you do not need a five-burner range or a battery of copper pots to create a meal that is both scientifically balanced and deeply satisfying. These six variations, from spicy Szechuan to creamy Coconut Lime, offer a rotating menu of high-protein fuel that fits into the busiest of schedules. So, grab your favorite mug, sharpen your knife, and start experimenting with the physics of the microwave. Your lunch break will never be the same.
The Kitchen Table
Can I use frozen chicken for these recipes?
Yes, but you must thaw it completely first. Frozen centers will remain raw while the outside overcooks. Thawing ensures the microwave energy distributes evenly through the protein fibers for a safe, tender result.
How do I prevent the sauce from overflowing?
Never fill your mug more than two-thirds full. The sauce will bubble and expand as the starch gelatinizes. Using a larger mug provides the necessary headspace for the steam to circulate without making a mess.
Is it safe to cook raw chicken in a microwave?
Absolutely. Microwaves cook food by vibrating water molecules, creating heat. As long as the chicken reaches an internal temperature of 165 degrees Fahrenheit, it is perfectly safe and often more moist than oven-baked versions.
What is the best mug to use?
Choose a heavy-walled ceramic mug. Ceramic retains heat well, which aids in the thermal carryover process. Avoid plastic containers, which can warp or leach chemicals at the high temperatures required to cook poultry.