
Imagine the scent of searing iron and toasted garlic wafting through your kitchen as the sun begins to dip below the horizon. There is a specific, primal satisfaction in hearing the hiss of a pressure valve while knowing that a rich, savory dinner is minutes away from hitting the table. When you are juggling a chaotic schedule, ground beef recipes pressure cooker style are your absolute secret weapon for delivering high-quality protein without the grueling wait times of traditional braising. We are talking about transforming humble crumbles into silk-textured ragus and piquant chili in a fraction of the time. This is not just about convenience; it is about leveraging high-pressure steam to force hydration into every fiber of the meat. By the time that lid pops open, you are greeted by a concentrated blast of umami that usually takes four hours to achieve on a stovetop. Let us dive into the chemistry of the quick-cook and turn your weeknight routine into a high-speed culinary masterclass.
The Gathers:
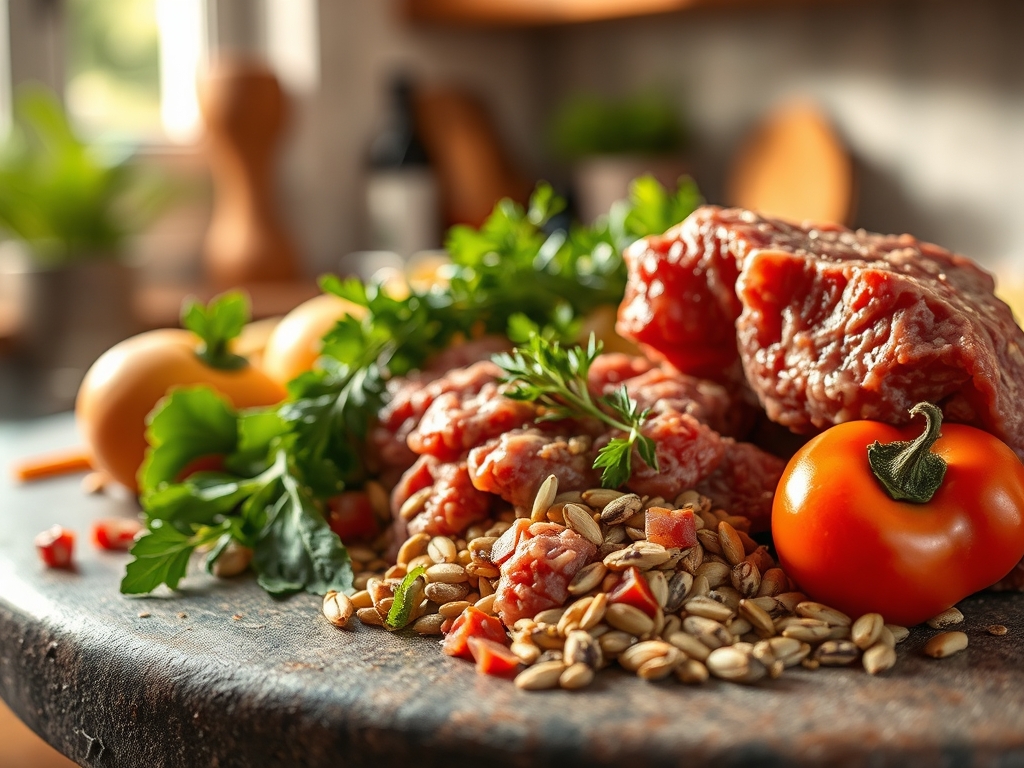
To execute these ground beef recipes pressure cooker favorites, your mise-en-place must be precise. Start with high-quality 80/20 ground chuck; the 20 percent fat content is essential for a viscous mouthfeel and to prevent the meat from becoming granular under pressure. You will need a microplane for grating fresh aromatics like ginger or garlic directly into the pot, ensuring the essential oils are released instantly. Gather your liquids: a rich bone broth or a dry red wine for those deep, acidic notes that cut through the fat.
Smart Substitutions: If you are looking to lighten the caloric load, you can swap half the beef for finely minced cremini mushrooms. This maintains the umami profile while increasing the moisture content. For those avoiding nightshades, replace tomato paste with a puree of roasted red peppers and a splash of balsamic vinegar to mimic that piquant tang. Always keep a bench scraper handy to quickly transfer your chopped mirepoix from the cutting board to the pot without losing a single cube of flavor.
The Clock:
Efficiency in the kitchen is all about the Chef's Flow. For these seven recipes, your active prep time will hover around 10 to 15 minutes. The actual "under pressure" time ranges from 5 to 12 minutes, depending on whether you are cooking a simple taco meat or a dense, vegetable-heavy stew. However, do not forget the "hidden" time: it takes about 8 minutes for the vessel to reach full pressure and another 5 to 10 minutes for a natural pressure release. Total "gate-to-plate" time is consistently under 35 minutes. By prepping your garnishes (fresh herbs, lime wedges, or shaved radish) while the machine is pressurized, you ensure that as soon as the steam clears, the meal is ready for the table.
The Masterclass:
1. The Sear and Render
Set your pressure cooker to the "Sauté" function and wait for it to get screaming hot. Add your ground beef in a single layer, resisting the urge to stir immediately. You want to trigger the Maillard reaction, which is the chemical reaction between amino acids and reducing sugars that gives browned meat its distinctive flavor. Use a heavy-bottomed skillet if your cooker's insert is too thin, though most modern inserts handle this well.
Pro Tip: Do not crowd the pot. If you add too much meat at once, the temperature drops and the meat will steam in its own juices rather than sear. This prevents enzymatic browning and results in a gray, rubbery texture.
2. Deglazing the Fond
Once the meat is browned and removed (or pushed to the side), you will see brown bits stuck to the bottom. This is the fond, a goldmine of flavor. Pour in a splash of broth or wine and use a wooden spoon to scrape every bit loose. This prevents the "Burn" notice and incorporates deep savory notes into your sauce.
Pro Tip: Deglazing is a form of solvent extraction. The liquid dissolves the caramelized proteins, creating a complex base that water alone cannot achieve.
3. Layering the Aromatics
Add your onions, carrots, and celery. Sauté until the onions are translucent, which indicates that the cell walls have broken down and the sugars are beginning to caramelize. Use your microplane to add garlic at the very last second so it does not burn and turn bitter.
Pro Tip: This stage is called sweating. By cooking aromatics in the rendered beef fat, you infuse the fat with fat-soluble flavor compounds that will later coat the entire dish.
4. The High-Pressure Infusion
Lock the lid and set your timer. During this phase, the boiling point of water increases, forcing moisture and flavors into the meat much faster than at sea level. This is where the magic of ground beef recipes pressure cooker style truly happens.
Pro Tip: High pressure accelerates hydrolysis, the process where collagen breaks down into gelatin. Even with ground beef, this creates a luxurious, velvet-like sauce.
5. The Controlled Release
When the timer beeps, decide between a Quick Release or a Natural Release. For ground beef, a 5-minute natural release followed by a quick release is usually best to keep the meat tender.
Pro Tip: A sudden drop in pressure can cause the muscle fibers to contract violently, squeezing out moisture. A gradual release allows for thermal carryover, finishing the cook gently.
The Deep Dive:
Macro Nutrition: On average, a serving of these beef meals provides 28g of protein, 14g of fat, and roughly 320 calories (excluding grains). It is a powerhouse for muscle recovery and satiety.
Dietary Swaps:
- Keto: Replace noodles or potatoes with riced cauliflower or zoodles added after the pressure cook.
- Vegan: Use a soy-based crumble or lentils; reduce the pressure cook time by half to avoid mushiness.
- Gluten-Free: Ensure your beef broth is certified GF and use cornstarch or arrowroot as a thickener instead of flour.
The Fix-It:
- Too Watery: Switch back to "Sauté" and simmer uncovered for 5 minutes to reduce the liquid and concentrate flavors.
- The "Burn" Signal: This usually means there was not enough thin liquid. Scrape the bottom, add 1/4 cup of water, and restart.
- Bland Flavor: You likely need more acid. A squeeze of lemon or a teaspoon of apple cider vinegar will "brighten" the heavy fats.
Meal Prep: To maintain "day-one" quality, cool the beef quickly in a shallow container. When reheating, add a tablespoon of water or broth to the bowl before microwaving. This creates a mini-steam environment that prevents the beef from becoming "rubbery" or dry.
The Wrap-Up:
Mastering ground beef recipes pressure cooker style is like having a culinary cheat code. You have learned how to harness the power of the Maillard reaction, the importance of deglazing, and the science of hydrolysis to create meals that taste like they simmered all afternoon. Whether you are making a zesty taco filling or a sophisticated Bolognese, these techniques ensure your beef is always succulent and your sauces are perfectly emulsified. Now, grab your tongs and your favorite spices; it is time to turn under-pressure cooking into your nightly triumph.
The Kitchen Table:
Can I cook frozen ground beef in the pressure cooker?
Yes, you can cook frozen beef directly. Add 1/2 cup of water and cook on high pressure for 20 minutes. However, you will miss out on the flavor-boosting Maillard reaction because you cannot sear frozen meat effectively.
How do I prevent the "Burn" notice with beef?
Always deglaze the pot thoroughly after searing. Ensure there is at least one cup of thin liquid (broth or water) at the bottom. Avoid adding thickeners like cornstarch or heavy tomato sauces until after the pressure cooking cycle.
Why is my ground beef tough after pressure cooking?
Toughness usually results from using meat that is too lean or using a "Quick Release" too early. The 80/20 fat ratio provides lubrication, while a 5-minute "Natural Release" prevents the muscle fibers from seizing up and becoming dry.
Can I add pasta directly to the beef in the pot?
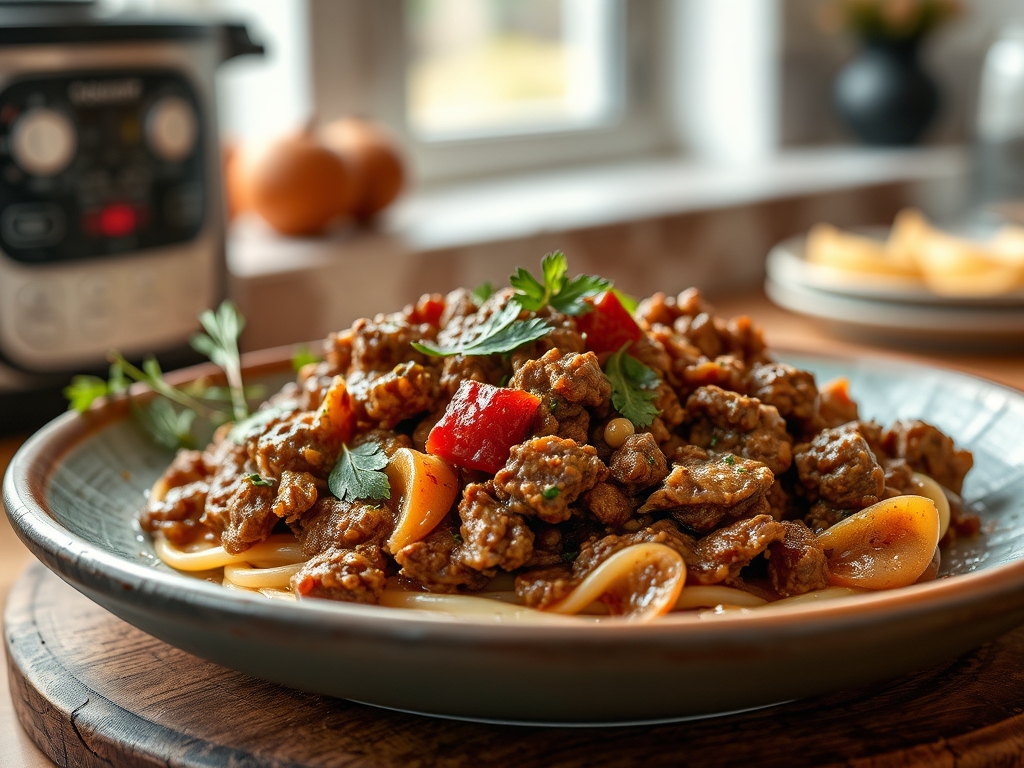
Absolutely. For a one-pot meal, add dry pasta on top of the beef and submerge it in broth. Cook for half the time listed on the pasta box. This allows the starch to aerate and thicken the sauce naturally.