
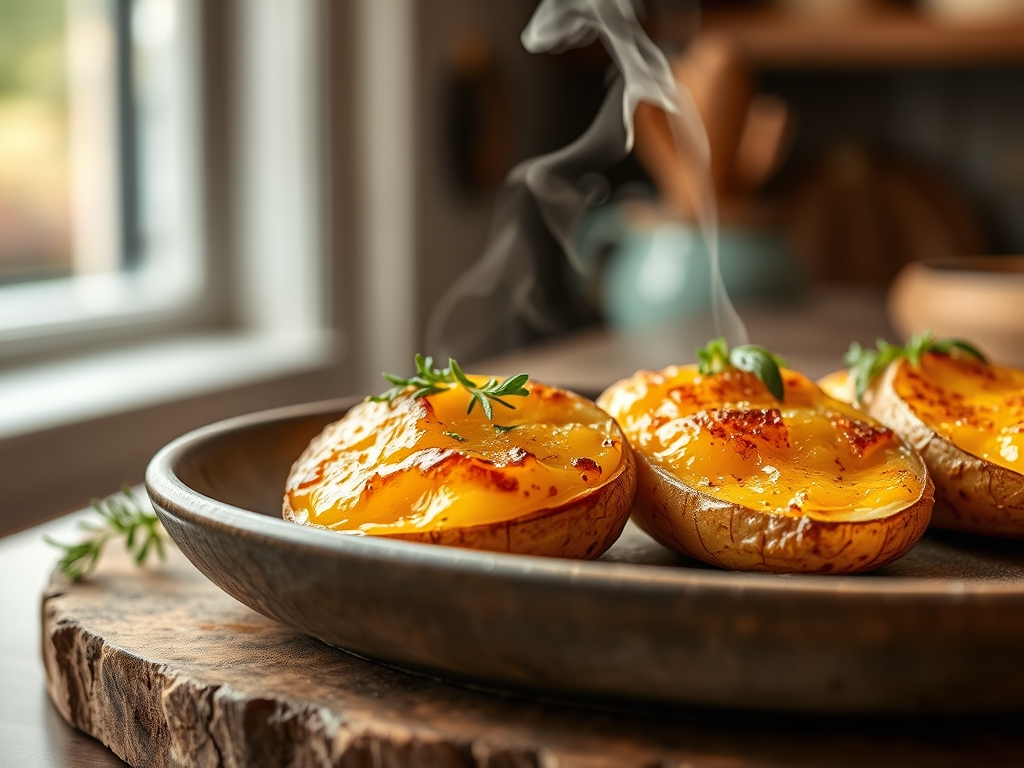
Imagine a texture so ethereal that it defies the structural integrity of a root vegetable. Picture a golden, glass-like crust that shatters under a fork to reveal a center as soft as whipped butter. This is the magic of melting potato recipes; a culinary phenomenon where high-heat roasting meets a decadent braise. It is the ultimate side dish for those who demand both crunch and creaminess in a single bite.
The secret to these spuds lies in a two-stage thermal process. First, we achieve intense Maillard browning to create a savory exterior. Then, we introduce a flavorful liquid that allows the starch granules to gelatinize and soften completely. It is not just cooking; it is a molecular transformation. Whether you are hosting a high-stakes dinner party or simply craving a soulful midweek meal, mastering this technique will change your kitchen repertoire forever. We are moving beyond the humble roasted wedge into the realm of professional gastronomy.
The Gathers:
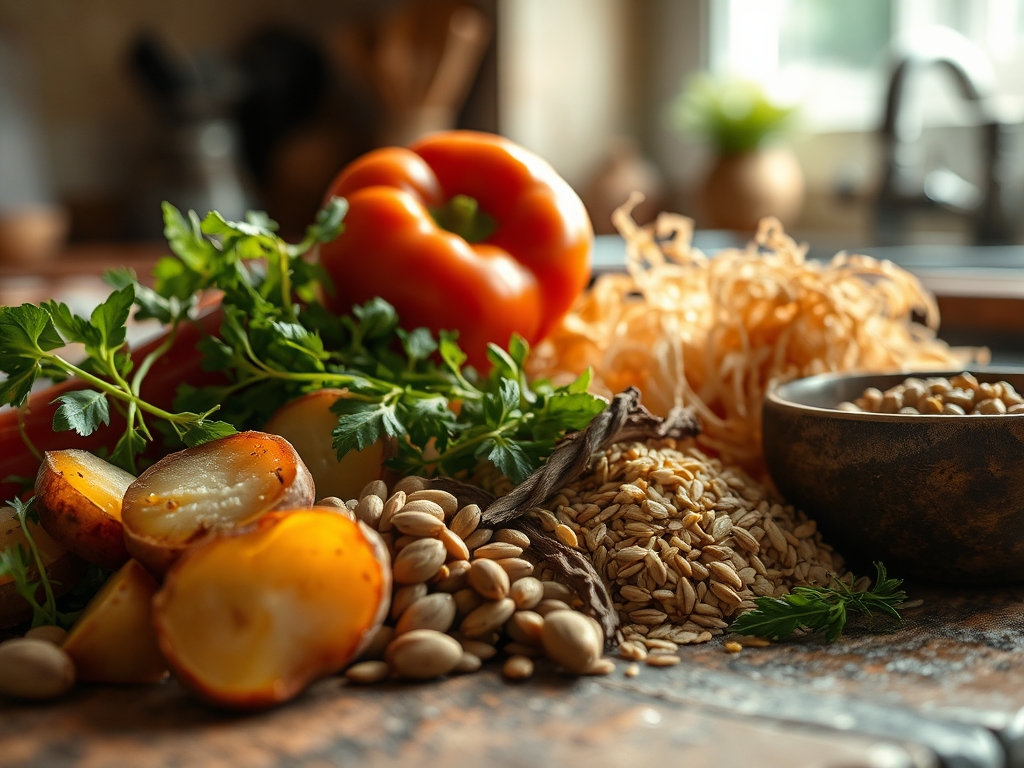
To begin, you need the right raw materials. Select Yukon Gold potatoes for their high starch-to-sugar ratio and naturally buttery hue. Unlike starchy Russets, which can turn grainy, or waxy reds that hold their shape too stubbornly, Yukon Golds offer a middle-ground amylopectin content that creates a luxurious, viscous interior. You will also need unsalted butter for its milk solids, which provide that signature nutty aroma when browned.
Your mise-en-place should include fresh thyme and rosemary sprigs to infuse the fats. For the braising liquid, a high-quality chicken or vegetable stock is essential. Use a digital scale to ensure your potato rounds are uniform; consistency in mass ensures consistency in heat distribution.
Smart Substitutions:
If you are looking for a piquant twist, swap half the butter for duck fat or tallow. This increases the smoke point and adds a deep, savory complexity. For those avoiding dairy, a high-quality avocado oil paired with a splash of nutritional yeast can mimic the richness of traditional melting potato recipes. If you lack fresh herbs, a teaspoon of dried herbes de Provence added during the deglazing stage will suffice, though fresh aromatics are always superior for their volatile oils.
The Clock:
Efficiency in the kitchen is about the "Chef's Flow." Expect a total commitment of 60 minutes. Your active prep time is a brisk 15 minutes; this includes peeling, slicing, and organizing your station. The initial searing phase takes 10 minutes on the stovetop, followed by a 30-minute roast in a 425-degree oven. Finally, allow for a 5-minute rest period. This rest is non-negotiable; it allows the internal steam to redistribute, ensuring the potatoes do not fall apart when plated. Using a heavy-bottomed skillet, such as cast iron, is vital here because it retains thermal mass, preventing temperature drops when the cold potatoes hit the pan.
The Masterclass:
1. The Precision Cut
Peel your potatoes and slice them into thick cylinders, roughly one inch tall. Use a bench scraper to clear your board of debris, keeping your workspace immaculate. Uniformity is the soul of this dish.
Pro Tip: Cutting the potatoes to a uniform thickness ensures even thermal conductivity. If one slice is thinner, it will over-gelatinize and collapse before the thicker pieces reach the desired tenderness.
2. The High-Heat Sear
Heat your skillet with a high-smoke-point oil. Place the potato rounds in the pan, ensuring they do not touch. Use tongs to flip them once they develop a deep, mahogany crust.
Pro Tip: This stage utilizes the Maillard reaction, a chemical reaction between amino acids and reducing sugars that creates hundreds of different flavor compounds. Do not crowd the pan, or you will trap steam and boil the potatoes instead of searing them.
3. The Aromatic Infusion
Once flipped, add your butter and whole herb sprigs. Use a large spoon to baste the potatoes with the foaming butter. This is where the flavor deepens.
Pro Tip: Basting creates a barrier of fat that slows down enzymatic browning on the second side while forcing the herbal essential oils into the surface of the potato.
4. The Deglaze and Braise
Carefully pour your stock into the pan. It should come about halfway up the sides of the potatoes. The liquid will bubble violently; this is the deglazing process, which lifts the flavorful browned bits (the fond) from the bottom of the pan.
Pro Tip: The addition of liquid initiates starch gelatinization. The starch molecules absorb the stock and swell, turning the interior from a rigid structure into a melt-in-your-mouth puree.
5. The Oven Transformation
Transfer the skillet to the oven. At 425 degrees Fahrenheit, the stock will reduce into a thick, savory glaze while the tops of the potatoes stay crisp.
Pro Tip: High-heat roasting encourages evaporative cooling on the surface, which keeps the crust from burning while the interior temperature climbs to the necessary 210 degrees Fahrenheit for total softness.
6. The Final Rest
Remove the pan and let it sit. The remaining liquid will be absorbed, and the fats will slightly solidify, creating a glossy finish.
Pro Tip: Thermal carryover will continue to cook the center of the potatoes for several minutes after they leave the oven. Resting prevents the cell walls from rupturing prematurely, which would result in a greasy texture.
The Deep Dive:
Macro Nutrition:
A standard serving of melting potatoes provides approximately 220 calories, primarily from complex carbohydrates and healthy fats. While they are a decadent treat, potatoes are an excellent source of potassium and Vitamin C. To lighten the profile, reduce the butter and increase the ratio of collagen-rich bone broth.
Dietary Swaps:
For a Vegan version, use a high-quality vegan butter substitute and mushroom stock for an umami punch. For Keto enthusiasts, this technique can be applied to radishes or turnips, though the roasting time will decrease significantly. This recipe is naturally Gluten-Free, provided your stock is certified.
The Fix-It:
- Soggy Bottoms: This happens if there is too much liquid at the end. Fix it by returning the skillet to the stovetop burner for two minutes to reduce the remaining stock into a syrup.
- Burned Butter: If your butter turns black, the heat was too high. Next time, add a splash of neutral oil to the butter to raise its smoke point.
- Hard Centers: This indicates the potatoes were undercooked or the oven temperature was too low. Cover the pan with foil and add a splash more stock, then roast for an additional ten minutes.
Meal Prep & Reheating:
To maintain "day-one" quality, do not use a microwave. Reheat the potatoes in a saucier or small pan with a tablespoon of water and a lid. This creates a mini-steam chamber that softens the starch without drying out the crust.
The Wrap-Up:
You now hold the keys to the kingdom of melting potato recipes. By understanding the interplay between high-heat searing and liquid-based braising, you have transitioned from a home cook to a culinary scientist. These potatoes are more than a side dish; they are a conversation starter. The contrast between the salty, herb-infused crust and the velvet interior is a testament to the power of technique over expensive ingredients. So, grab your skillet, sharpen your knife, and prepare to ruin all other potato dishes for your friends and family.
The Kitchen Table:
Which potato variety is best for melting recipes?
Yukon Gold potatoes are the premier choice. Their medium-starch content provides a creamy, custard-like interior while maintaining enough structural integrity to hold a sear. Russets are often too floury, while waxy reds fail to absorb the braising liquid properly.
Can I make melting potatoes ahead of time?
Yes, you can sear and braise them, then store them in the refrigerator. To serve, reheat them in a 400-degree oven for ten minutes. This helps re-crisp the exterior skin while gently warming the gelatinized starch center.
Why do my potatoes stick to the pan?
Sticking usually occurs if the pan is not hot enough before adding the fat, or if you try to flip the potatoes too early. The potatoes will naturally release from the surface once a proper Maillard crust has formed.
What is the best pan for this recipe?
A heavy-bottomed cast iron skillet or a stainless steel tri-ply pan is best. These tools provide superior heat retention and even distribution, which is critical for achieving a uniform golden-brown sear across all potato surfaces.